Assembling tutorial: Infill G4 double-DIN CarPC ... - CarTFT.com
Assembling tutorial: Infill G4 double-DIN CarPC ... - CarTFT.com
Assembling tutorial: Infill G4 double-DIN CarPC ... - CarTFT.com

You also want an ePaper? Increase the reach of your titles
YUMPU automatically turns print PDFs into web optimized ePapers that Google loves.
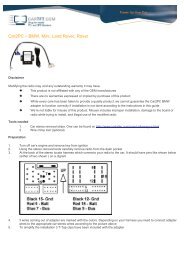
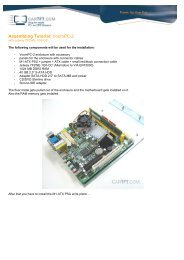
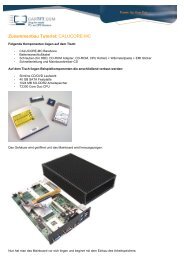
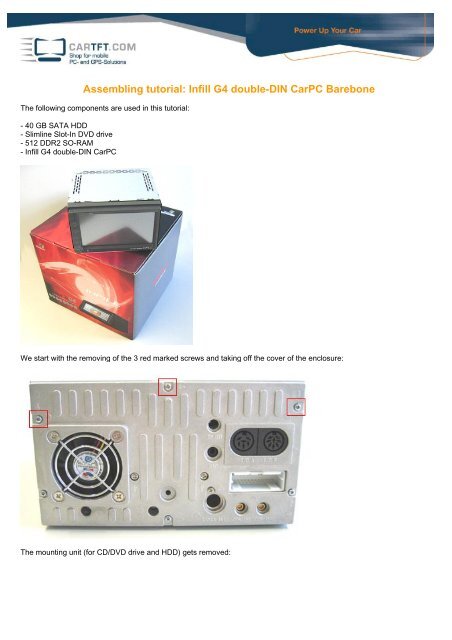
<strong>Assembling</strong> <strong>tutorial</strong>: <strong>Infill</strong> <strong>G4</strong> <strong>double</strong>-<strong>DIN</strong> <strong>CarPC</strong> Barebone<br />
The following <strong>com</strong>ponents are used in this <strong>tutorial</strong>:<br />
- 40 GB SATA HDD<br />
- Slimline Slot-In DVD drive<br />
- 512 DDR2 SO-RAM<br />
- <strong>Infill</strong> <strong>G4</strong> <strong>double</strong>-<strong>DIN</strong> <strong>CarPC</strong><br />
We start with the removing of the 3 red marked screws and taking off the cover of the enclosure:<br />
The mounting unit (for CD/DVD drive and HDD) gets removed:
Then the long, golden spacers get removed.<br />
The SATA adapter gets screwed of the rear of the mounting unit:<br />
After that the CD/DVD drive gets installed onto the mounting unit and the included Slimline Adapter gets plugged at the rear<br />
of the CD/DVD drive:
The 4 screws of the next layer get removed:<br />
Remove the little circuit board:
Remove the 2 screws at the sides (red quadrangle in the middle).<br />
The 2 other red marked plastic clips have to be pushed in a little, so that you can turn the front forwards:<br />
Remove the screws and bring up the device to turn the front forwards:
So it looks opened out:<br />
Then you can remove the last part of the case:
Now the RAM module gets installed:<br />
After that you can turn up the front again and take care, that all the clips are snapped into place.<br />
The little circuit board gets screwed on again.
The 4 spacers get screwed in again:<br />
The SATA adapter gets screwed again at the mounting unit and then the HDD gets plugged into its place and gets fastened:
Now the ribbon cable gets connected to the DVD drive, the board gets screwed tight and the cover of the enclosure gets<br />
put-on and the barebone gets screwed on:<br />
The PC-system is now assembled.
Author: B. Lambert - <strong>CarTFT</strong>.<strong>com</strong> e. K.<br />
Last update: 14.06.2007